
CocosCreator 仿飞机大战
实现一个简易版飞机射击游戏 —— 鹰击长空(cocos creator 3.84)
1. 滚动背景
1.1 创建背景板
- 添加面片 create 3D Object - Plane(面板)
- 新建材质:资源管理器Assets - create Material - Effect选builtin-unlit - 勾选 USE TEXTURE - 设置 Main Texture(放入背景图)
- 材质应用到背景板上:Plane属性 - Materials - 选中刚创建的材质
1.2 设置预览尺寸
- 偏好设置Perferences - Device Manager - 随机选一个设备,改变宽高为720 * 1280px(适合移动端预览), Device Name为develop,Add Device
- 点击Main Camera - Scene缩略图中选用刚刚设置好的develop视图
- 设置Camera参数:
Rotation: -90 0 0,Projection: ORTHO(正交相机,怎么弄都不会动),Position: 0 10 0 - 设置背景板参数:
Scale: 1 1 2,Position: 0 10 0, 微调让背景图覆盖预览框
1.3 实现滚动效果
- create empty node
movingBg- 复制背景板为bg1, bg2放入movingBg中, 两个背景板轮流替换,实现滚动效果 - 资源管理器Assets - 新建文件夹script存放脚本资源 - 新建movingBg.ts - 将scrpit拖入
movingBg movingBg属性中设置bg1,bg21
2
3
4
5
6
7
8
9
10
11
12
13
14
15
16
17
18
19
20
21
22
23
24
25
26
27
28
29
30
31
32
33
34// movingBg.ts
import { _decorator, Component, Node } from 'cc';
const { ccclass, property } = _decorator;
@ccclass('movingBg')
export class movingBg extends Component {
@property(Node)
bg1: Node = null
@property(Node)
bg2: Node = null
private _bgSpeed = 2
private _bgMovingRange = 20
private moveBg(deltaTime: number) {
this.bg1.setPosition(0, 0, this.bg1.position.z + this._bgSpeed * deltaTime)
this.bg2.setPosition(0, 0, this.bg2.position.z + this._bgSpeed * deltaTime)
if (this.bg1.position.z > this._bgMovingRange) {
this.bg1.setPosition(0, 0, this.bg2.position.z - this._bgMovingRange)
} else if (this.bg2.position.z > this._bgMovingRange){
this.bg2.setPosition(0, 0, this.bg1.position.z - this._bgMovingRange)
}
}
start() {
this.bg1.setPosition(0, 0, 0)
this.bg2.setPosition(0, 0, -this._bgMovingRange)
}
update(deltaTime: number) {
this.moveBg(deltaTime)
}
}
2. 物件
2.1 玩家飞机
- Scene里创建
player空节点 - 将assets中
plane01.mesh拖入player下 - 将
plane01.material的Effect设置为builtin-unlit,材质应用到飞机上
2.2 飞机子弹 Prefab
- aseets create bullet.material - Effect选builtin-unlit - USE TEXTURE选子弹图片 - Technique选
3-alpha-blend来让图片透明部分变透明 - assets create Node Prefab 子弹预制件 - 双击预制件,进入预制件编辑模式 - add component - Material设置为子弹材质,Mesh设置为quad.mesh,创建并绑定子弹飞行脚本bullet.ts (点击Scene左上角 save + close,可退出预制件编辑模式)
1
2
3
4
5
6
7
8
9
10
11
12
13
14
15
16
17
import { _decorator, Component, Node } from 'cc';
const { ccclass, property } = _decorator;
@ccclass('playerBullet')
export class playerBullet extends Component {
private _speed = 0.1;
private _range = -10
update(deltaTime: number) {
const pos = this.node.position
const z = pos.z - this._speed
this.node.setPosition(pos.x, pos.y, z)
if (z < this._range) {
this.node.destroy()
}
}
}
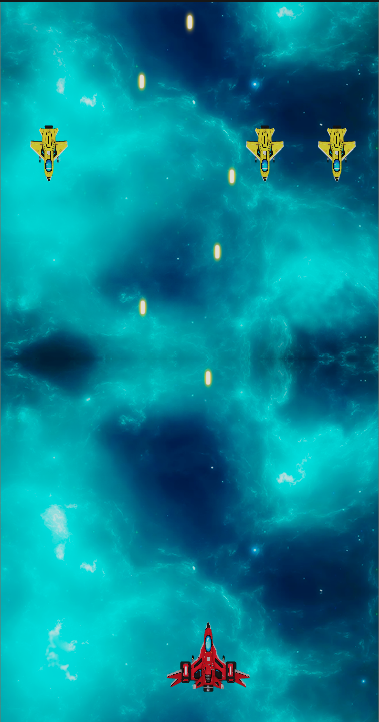
2.3 敌机 Prefab + 物理碰撞
同2.2步骤,创建敌机Prefab, 绑定敌机脚本,增加物理碰撞,子弹和敌机碰撞时,销毁敌机。
- 配置碰撞矩阵:Project - Project Settings - Physics - Add group - 设置碰撞矩阵
- player
- enemy
- player bullet
- enemy bullet
- 给物件添加碰撞组件 add component - physics - BoxCollider - 勾选 Is Trigger(这里只用到触发器)
- 给物件添加 add component - physics - RigidBody - 设置Group - Type: KINEMATIC(运动物体)
- 添加碰撞检测js
1
2
3
4
5
6
7
8
9
10
11
12
13
14
15
16
17
18
19
20
21
22
23
24
25
26
27
28
29
import { _decorator, Component, Node, BoxCollider } from 'cc';
const { ccclass, property } = _decorator;
@ccclass('enemy')
export class enemy extends Component {
private _speed = 0.1;
private _range = 20
start() {
const collider = this.node.getComponent(BoxCollider)
collider.on('onTriggerEnter', this.onTriggerEnter, this)
}
// 碰撞检测
private onTriggerEnter() {
this.node.destroy()
}
update(deltaTime: number) {
const pos = this.node.position
const z = pos.z + this._speed
this.node.setPosition(pos.x, pos.y, z)
if (z > this._range) {
this.node.destroy()
}
}
}
3. 游戏逻辑
3.1 UiMain.ts 用户交互
创建脚本UiMain.ts用来处理用户交互事件,挂载到scene下1
2
3
4
5
6
7
8
9
10
11
12
13
14
15
16
17
18
19
20
21
22
23
24
25
26
27
28
29
30
31
32
33
34
35
36
37
38
39
40
41
42
43
44
45import { _decorator, Component, Node, input, Input, Touch } from 'cc';
import { GameManager } from './GameManager'
const { ccclass, property } = _decorator;
@ccclass('UIManager')
export class UIManager extends Component {
@property(GameManager)
public gameManager:GameManager = null
@property(Node)
public player: Node = null
@property
public playerSpeed = 1
start() {
// 控制玩家飞机移动
input.on(Input.EventType.TOUCH_START, this._touchStart, this)
input.on(Input.EventType.TOUCH_MOVE, this._touchMove, this)
input.on(Input.EventType.TOUCH_END, this._touchEnd, this)
}
_touchStart() {
if (this.gameManager.isGameStart) {
this.gameManager.setIsShooting(true)
}
}
_touchMove(touch: Touch) {
if (!this.gameManager.isGameStart) return
const delta = touch.getDelta()
const pos = this.player.position
this.player.setPosition(
pos.x + 0.015 * this.playerSpeed * delta.x,
pos.y,
pos.z - 0.015 * this.playerSpeed * delta.y
)
}
_touchEnd() {
if (!this.gameManager.isGameStart) return
this.gameManager.setIsShooting(false)
}
}
3.2 gameMain.ts 游戏主逻辑
创建脚本gameMain.ts用来处理游戏主逻辑,挂载到scene下1
2
3
4
5
6
7
8
9
10
11
12
13
14
15
16
17
18
19
20
21
22
23
24
25
26
27
28
29
30
31
32
33
34
35
36
37
38
39
40
41
42
43
44
45
46
47
48
49
50
51
52
53
54
55
56
57
58
59
60
61
62
63
64
65
66
67
68
69
70
71
72
73
74
75
76
77import { _decorator, Component, Node, Prefab, instantiate, director } from 'cc';
import { Player } from '../Player';
const { ccclass, property } = _decorator;
@ccclass('GameManager')
export class GameManager extends Component {
// player
@property(Node)
public player: Player = null;
// bullet
@property(Prefab)
public bullet01: Prefab = null
// enemy
@property(Prefab)
public enemy: Prefab = null
@property(Node)
bulletRoot: Node = null
@property(Node)
enemyRoot: Node = null
public isGameStart = true
private _isShooting = false
private _shootTime = 0.3 // 每0.3s发射一次子弹
private _curShootingTime = 0.4 // 距离上次发射的时间
private _enemyTime = 3 // 每0.5s新增一次敌机
private _curEnemyTime = 0 // 距离上次敌机出现的时间
private _init() {
this.player.init()
}
start() {
this.createEnemy(4)
}
update(deltaTime: number) {
if (!this.isGameStart) return
// 玩家飞机发射子弹
this.createPlayerBullet(deltaTime)
// 出现敌机
this.createEnemy(deltaTime)
}
// 玩家飞机持续发射子弹
private createPlayerBullet(deltaTime: number) {
this._curShootingTime += deltaTime
if (this._isShooting && this._curShootingTime > this._shootTime) {
const pos = this.player.position;
const bullet = instantiate(this.bullet01)
bullet.setParent(this.bulletRoot)
bullet.setPosition(pos.x, 1, pos.z - 2)
this._curShootingTime = 0
}
}
// 增加敌机
private createEnemy(deltaTime: number) {
this._curEnemyTime += deltaTime
if (this._curEnemyTime > this._enemyTime) {
for (let i = 0; i <5; i++) {
const elem = instantiate(this.enemy)
elem.setParent(this.enemyRoot)
elem.setPosition(-3.5 + 2 * i, 1, -10)
}
this._curEnemyTime = 0
}
}
public setIsShooting(value: boolean) {
this._isShooting = value
}
}
4. 其他
4.1 关卡切换
保存当前场景为lv1.scene,在Asset里复制该场景,粘贴为lv2.scene, lv3.scene。在适当时候调用
director.loadScene('lv2')切换关卡director.loadScene(director.getScene().name)重新加载当前关卡
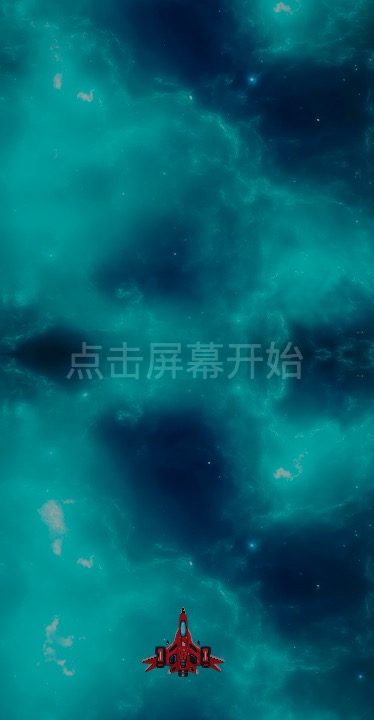
4.2 开始界面
- create UI组件 button - Label”点击屏幕开始” - 场景编辑器切换2D模式 - content size: 2048 * 2048 - color 设置为半透明黑(蒙层效果) - 点击canvas下的camera可以看到文字效果
- 新建
start.ts- 关联到button上,设置点击屏幕时,蒙层消失效果 - 设置click Events: Button组件, start, onBtnClick
1
2
3
4
5
6
7
8
9
import { _decorator, Component, Node } from 'cc';
const { ccclass, property } = _decorator;
@ccclass('start')
export class start extends Component {
onBtnClick() {
this.node.active = false
}
}
4.3 摄像机跟随
适合跑酷游戏,新建一个followTarget.ts, 挂载在Main Camera上1
2
3
4
5
6
7
8
9
10
11
12
13
14@ccclass('FollowTarget')
export class FollowTarget extends Component {
@property(Node)
player: Node;
offset = new Vec3(0, 5, 2) // camera应该在玩家的后上方
tmpPos = new Vec3()
update() {
this.player.getPosition(this.tmpPos) // 将this.player.position传入this.tmpPos向量中
this.tmpPos.add(this.offset) // 叠加一定距离,设置camera position实现跟随
this.node.position = this.tmpPos
}
}